
Auto selecting prices based on membership level can greatly benefit businesses by providing a more personalized and efficient pricing strategy. By dividing customers into categories such as Gold, Platinum, and Silver, businesses can effectively target different customer segments and offer tailored pricing options.
This approach not only streamlines the pricing process, but it also encourages customers to upgrade their membership level and receive exclusive benefits and discounts. Additionally, auto selecting prices based on membership level allows businesses to effectively manage their pricing strategies and stay competitive in their respective market.
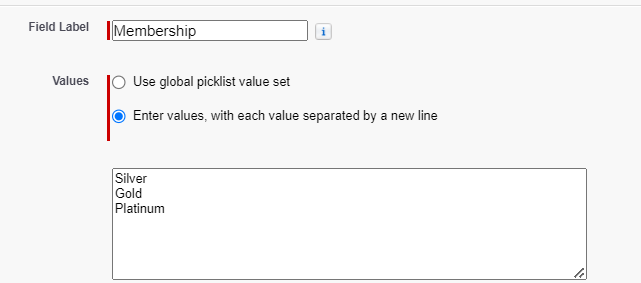
For this use case, you want to apply different prices according to the membership level of the Account. For this case, I’ve setup a custom field called “Membership” (picklist field) in the Account object. But you can reference any other field in Account, Opportunity, Order
We’ll build Context Rules to select the correct Price from 3 different Child Price Lists according to the Membership level of the Account associated with our Opportunity/Order.
Create a Vlocity Picklist to mirror your custom field Picklist
This may seem trivial but I spent almost a week figuring out what was wrong with my Context Rule because it was failing. If the field you’ll be referencing is a Picklist (as it is in our usecase) you’ll have to create a Vlocity picklist that mirrors it. This step is required. SF documentation makes it sound like it’s optional but the Rule will absolutely fail without it.
From the App Launcher, open Vlocity Product Designer and Create a Vlocity Picklist. To create a Picklist, check out our tutorial on How to Create a Vlocity Picklist.
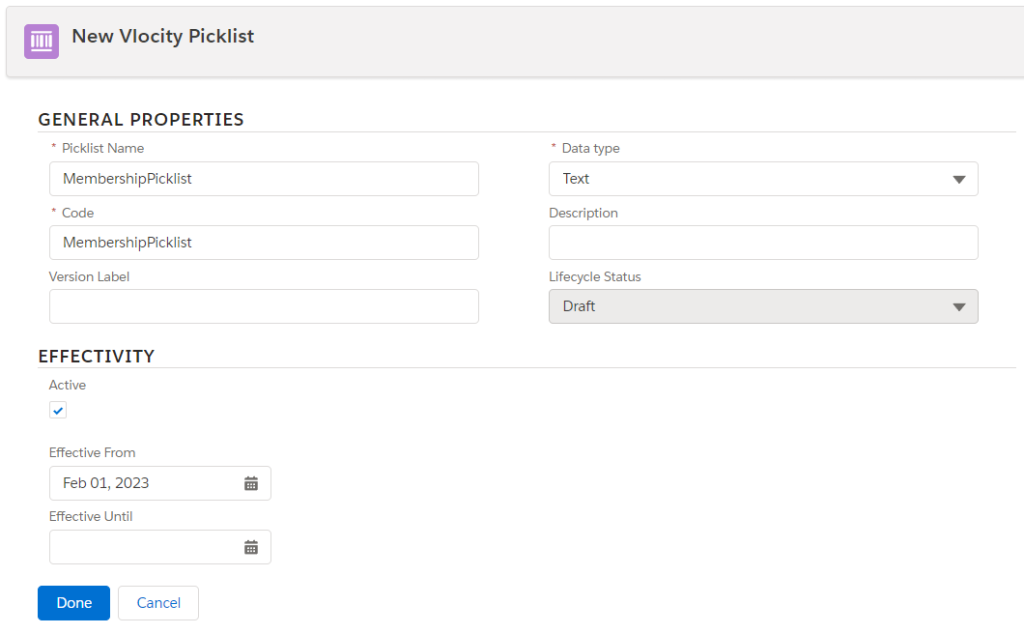
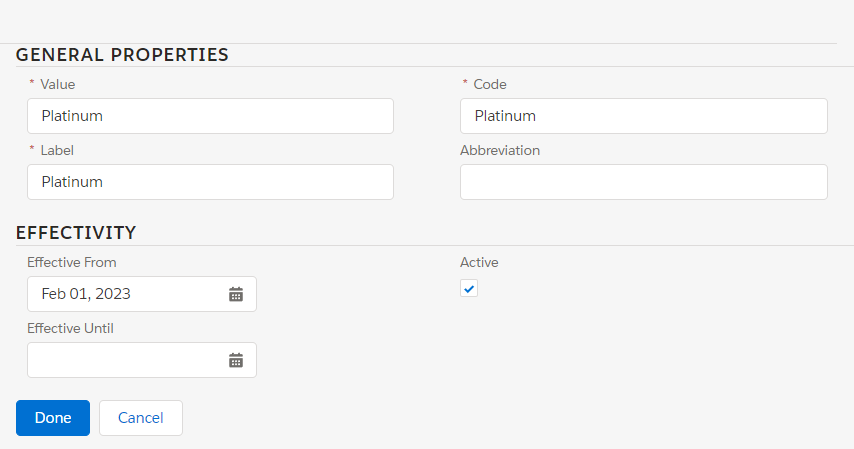
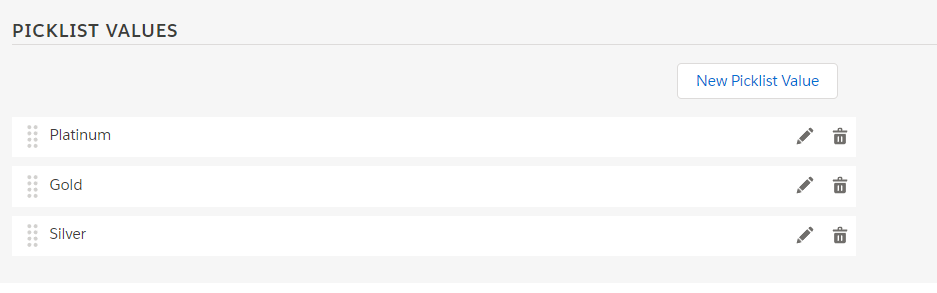
Create a picklist from the Vlocity Product Designer, (if you stay in the Pricing designer, you won’t have access to the correct interface to add your values). Use with any name and code you prefer, but set the values exactly the same as your original SF picklist. Use the same for Value, Label and Code.
Avoid using symbols (other than _ or – )
When you’re done, swap back to the Vlocity Pricing Designer to continue.
For the entirety of this tutorial, we’ll be doing everything through the Vlocity Pricing Designer app.
Check the configuration for Context Rules
Enable the necessary Interface Implementations for running Vlocity Context Rules Framework
From the App Launcher, type in Interface and open Interface Implementations.
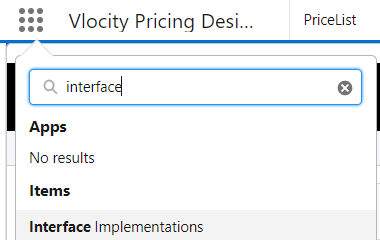
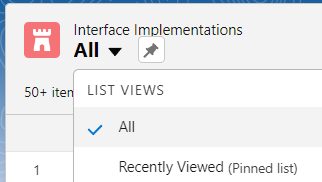
Set the List View to All.
Search and enable the following Interfaces, open each of them and in the Related Tab, you’ll find the Implementation.
| Search and open this Interface | Enable this Implementation |
| ContextRuleService | ContextRuleService |
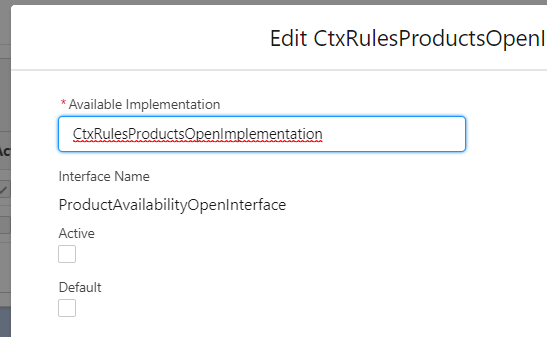
| ProductAvailabilityOpenInterface | CtxRulesProductsOpenImplementation |
| PricingManAdjEligibilityInterface | PricingManAdjEligibilityService |
| RepricingManAdjEligibilityInterface | RepricingManualAdjEligibilityService |
| TightestMatchInterface | TightestMatchServiceImplementation |
When you open each Interface, you’ll find in the Details section all the available associated Implementations. Some of these have more than one Implementation associated with them but only one Implementation can be active at once. Make sure the required ones are active.
Sometimes the one you need is already the Active Implementation, you can let that one be and move on to the others on the table above.

But if you need to set the right one to active, you can click the down arrow next to it and hit Edit.

A pop up will appear. Do not edit the Implementation name or anything else. Just tick the Active checkbox and click Save.
Some will be enabled, others won’t. Make sure you wait until it’s saved (it may take a few seconds, don’t click away). Wait until the green confirmation notice.
Enable necessary custom CPQ Configuration
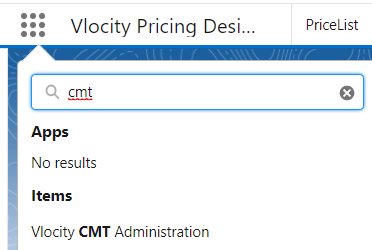
- Open the App Launcher and type in CMT and open the Vlocity CMT Administration
- Open CPQ Configuration Setup
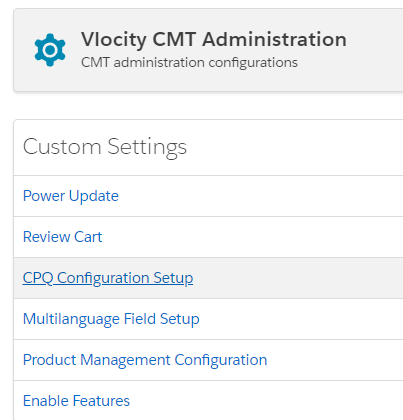
- Look for ContextRulesEnabled and set it to True by clicking on the pencil icon next to it and type in True and click Save.
Setup Context Rules Components
Now that you have the right settings for the Context Rules engine to work, it’s time to create the Components that will embody your Context Rules for assigning the right prices according to a client’s membership level.
You’ll need to set up the following:
- Context Scope
- Context Dimension
- Context Rules
- Context Rule Sets
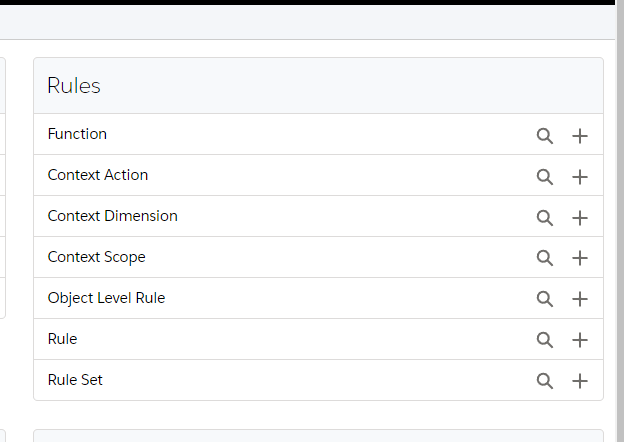
From the App Launcher, type in Console and open the Vlocity Product Console.
Setup Context Scope
Context Scope defines in what object (or through what object relationship) the system will go looking to. For this Use Case, I’ve chosen Opportunity, but it can be Order (if we replace every instance of Opportunity for Order in this step.)
If this is the first time that Context Rules are being used in this org, it’s very likely that Context Scopes haven’t been set up. For more information about the default Scopes, check out SF help here.
For the purpose of this tutorial, we’ll only setup OpportunityScope because that’s the one we’ll be using. But it can also be OrderScope if you are using the Order. Just replace Opportunity for Order.
- From the Vlocity Product Console, on the Rules section, click on the Plus sign next to Context Scope. A new subtab under Vlocity Product Console opens up.
- Fill out the information as follows:
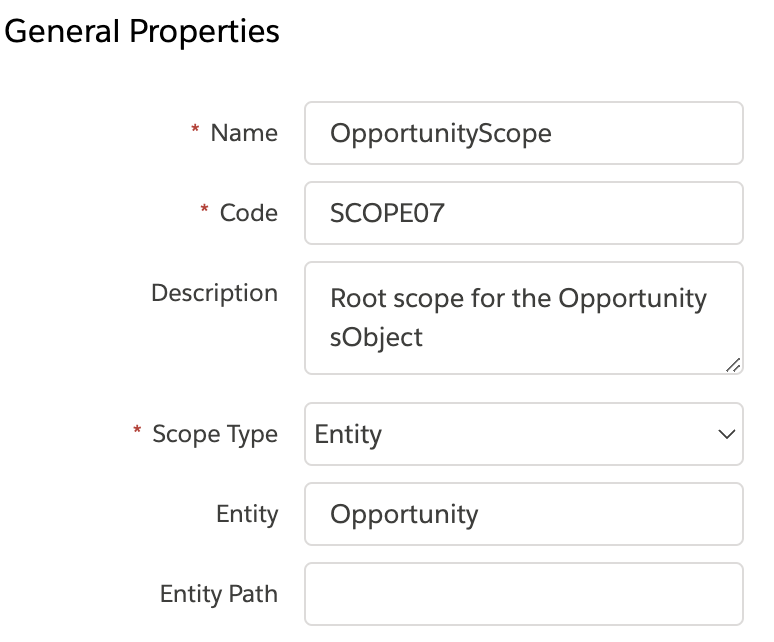
- Click Save.
- Go back to the Dashboard tab to continue. You can close the OpportunityScope tab if you want.
Create a Context Dimension
This will define where/what field to look for your values within the Scope (object) you configured in the last step. In this case, we already have Opportunity in the Scope and now we want to know what membership level the account is in order to choose the right price.
- From the Dashboard’s Rules section, click on the Plus sign next to Context Dimension.
- Fill out the New Context Dimension’s General Properties as follows:
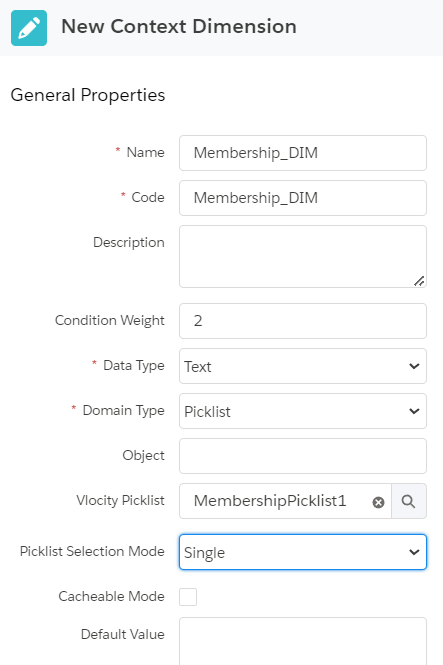
- Name and Code doesn’t matter as long as it is unique and Code has no spaces. I chose to name them both the same for simplicity and add a suffix so that I can tell what component is what (You’ll see why later).
- For Vlocity Picklist open the magnifier and choose the Picklist you previously created in this tutorial to mirror your SF picklist field and click Select.
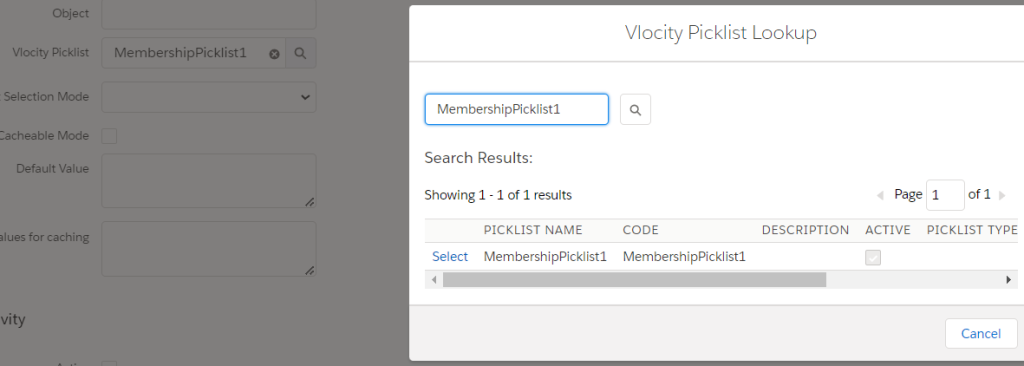
- Set the Picklist Selection mode as Single.
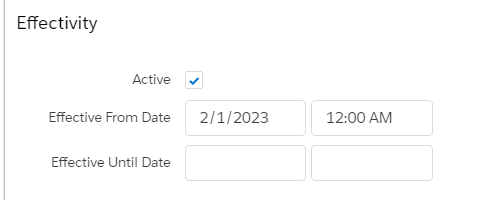
- Scroll down to fill out the Effectivity section with a date in the past and check the Active Box. Leave Until date empty.
- Click Save at the bottom
- Wait for confirmation and go to Context Mappings tab in the left pane.
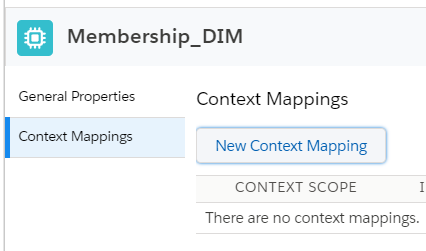
- Click New Context Mapping button. A panel opens on the right.
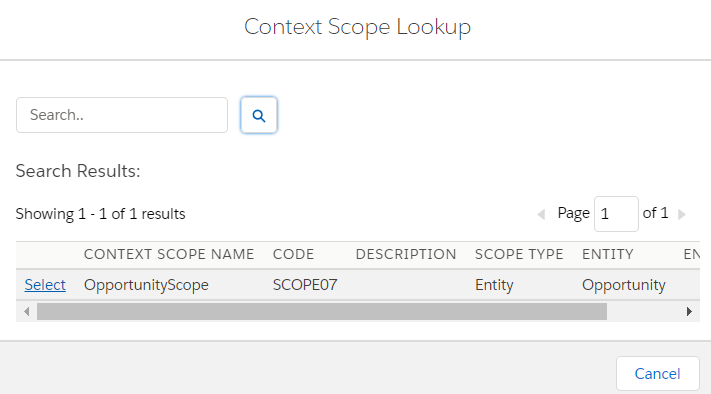
- Click on the Magnifier to look up for the Context Scope you created earlier to reference Opportunity (or Order). Look for it and click Select.
- For Context Mapping, Set the values as follow:
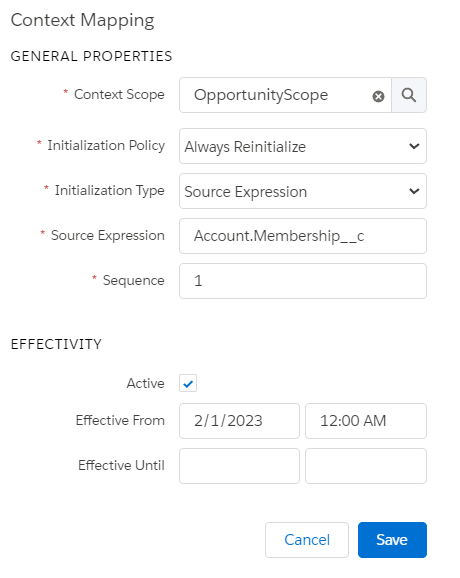
In Source Expression you’ll fill in the name of the object (in our example: Account) followed by a dot and then the field within that object. This works because it’s the Opportunity object has a relationship with Account. It is as thought I were to run a query and look for fields in Account through it’s relationship Opportunity. It would work the same way if you do it with Order too.
- Make sure to check Active and set a date in the past for Effective From only, leave the other date empty.
- Click Save.
Go back to Dashboard. You can close the Dimension tab if you want.
Creating Vlocity Context Rules
Configure the Rules
The rules will define when a client qualifies for each of the Membership Levels.
We’ll create a Rule for each of the Membership levels: Platinum, Gold and Silver.
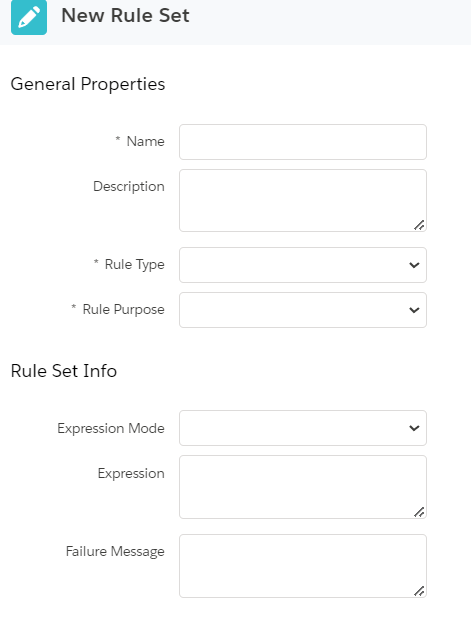
- Click on the plus sign next to Rules.
- Fill out the General Properties as follows:
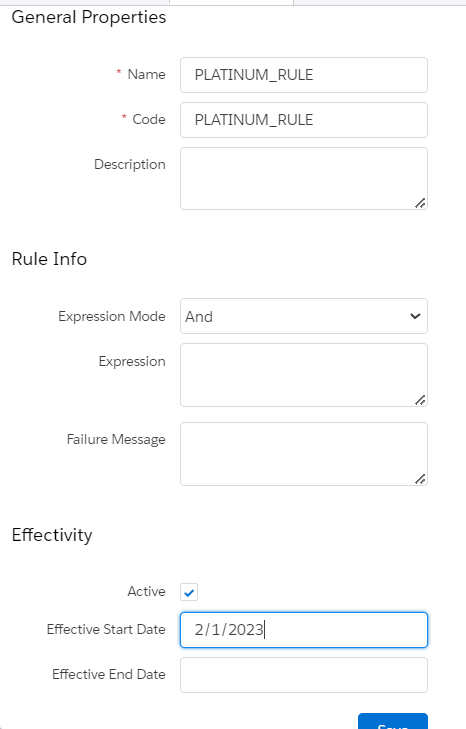
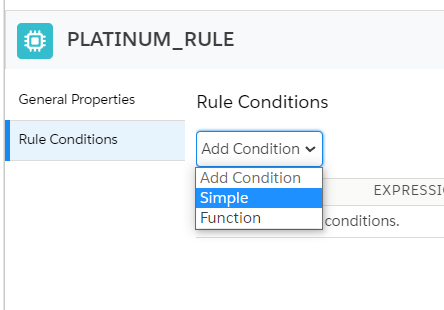
Fill out the following information in the pane on the right. For Context Dimension, you’ll select the Dimension you created in the previous step using the lookup window. Remember that the Code must be unique and no spaces.
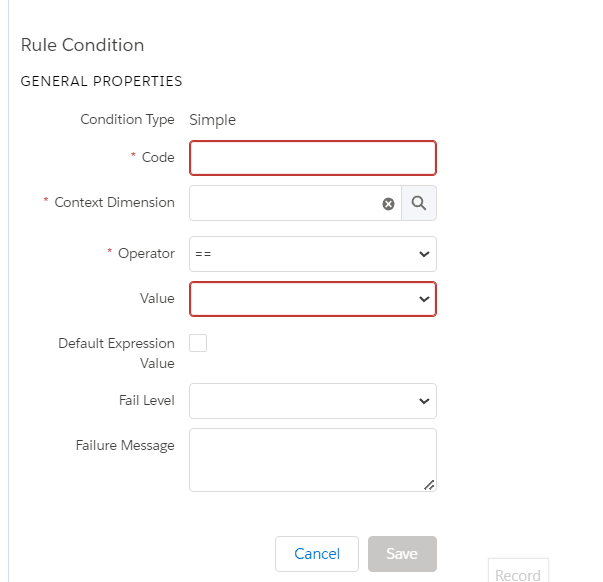
For Operator make sure to set == and for Value you’ll pick accordingly. In the picture above we’re setting Platinum Rule first. This value comes from the Picklist you set earlier that mirrors your original picklist. Set the fail level and click Save.
Go back to the Dashboard and repeat the steps again to create a Rule for Gold and another for Silver.
Packaged the Rules into Rule Sets
Now that you have all three Rules set, let’s package each into a Rule Set.
You don’t assign “Rules” directly, instead you bundle them (or the single one) into a Rule Set and then apply that Rule Set to a Promotion, Price List Entry, Price List or Discount.
From the Dashboard, click on the Plus sign next to Rule Set.
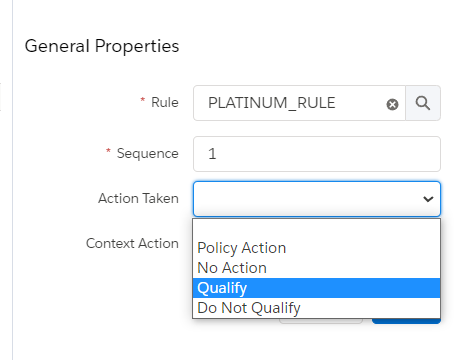
From the left side, click on Children Rules, then click on the New Child Rule button. We’ll be adding the Platinum Rule we created in the previous step to this set alone.
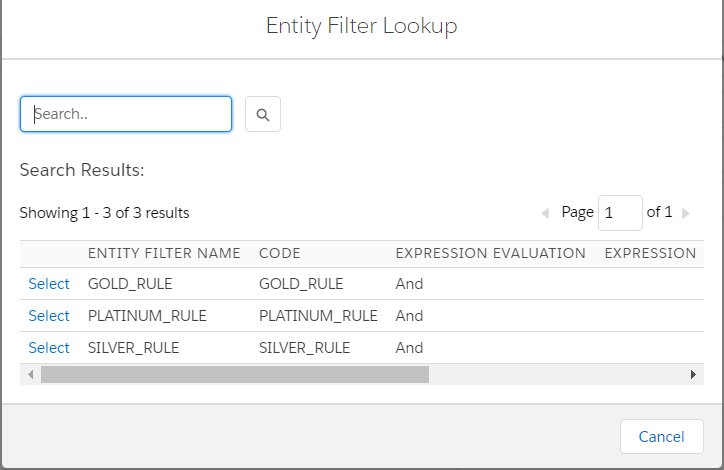
On the right side, there will be a Pane with a lookup to Rule. Find the Rule, set the Sequence to 1 and Action to Qualify.
Click Save.
Repeat this step for Gold set and Silver Set and you’re done.
Applying Context Rules to Child Price Lists for Silver, Gold and Platinum
If you don’t know how to create a Price List, check out this tutorial: How to create Price Lists
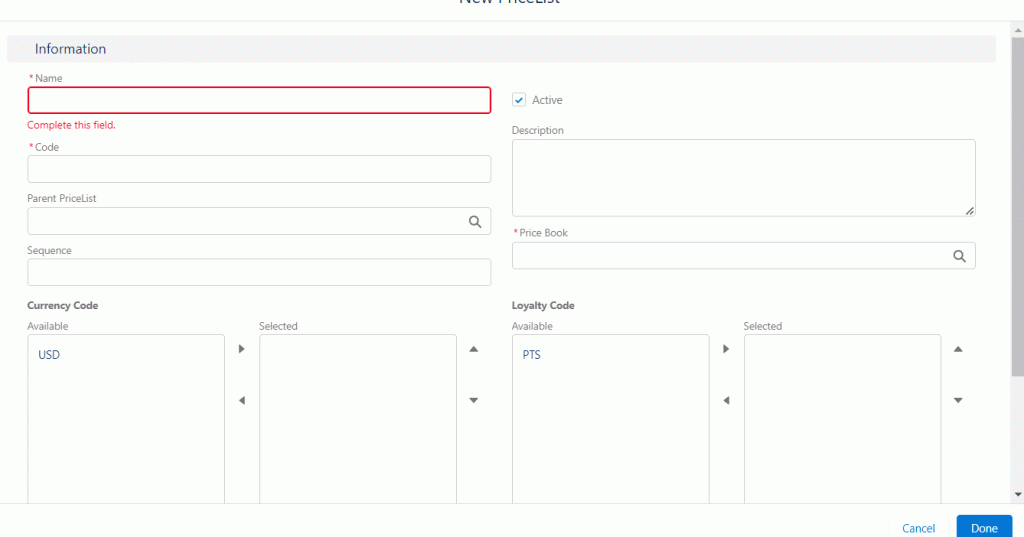
First, create a Price List to serve as Parent and then three more as Gold, Silver and Platinum.
For these three, in the Parent Price List field, set the Main one as parent. The Main one is the one we’ll see in the cart and the other three will hide beneath it, but once the rules are applied, the cart will pick the entry from the right child price list.
Once you’re done creating the 4 pricelists and designating the Gold, Platinum and Silver price lists as child pricelists of the Main one, continue by adding the price list entries in the next step.
Add Price List Entries for each Product on each Child Price List
Now we’ll add the prices. You can do this in two different ways:
- Through each Product, via Pricing tab via the Product Designer
- Through each of the Price Lists and add entries via Pricing Designer

Optionally, you may add the prices directly on each of the Price Lists
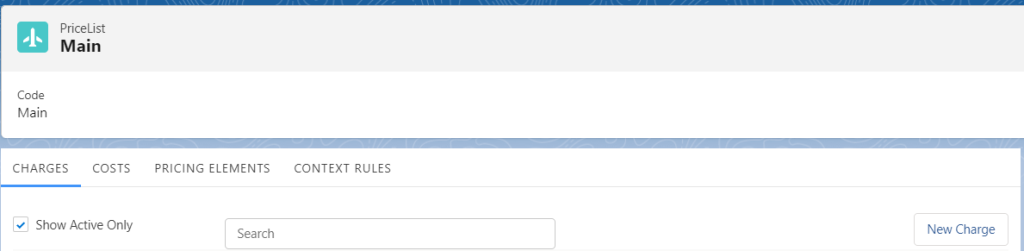
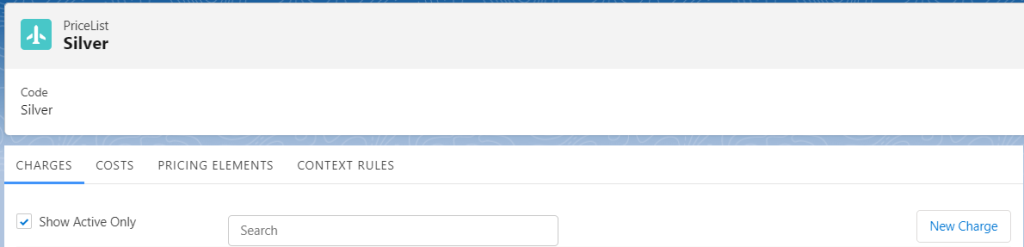
In the Charges tab, click New Charge and start adding Price List entries, one for Main and one for each of the child price lists.


Similarly to adding prices from the Product’s Pricing tab, you’ll have to fill in the required information for each Price List entry in each price list and additionally choose for what product this price will belong to. The entry will automatically show up on the Product’s Pricing tab as well.
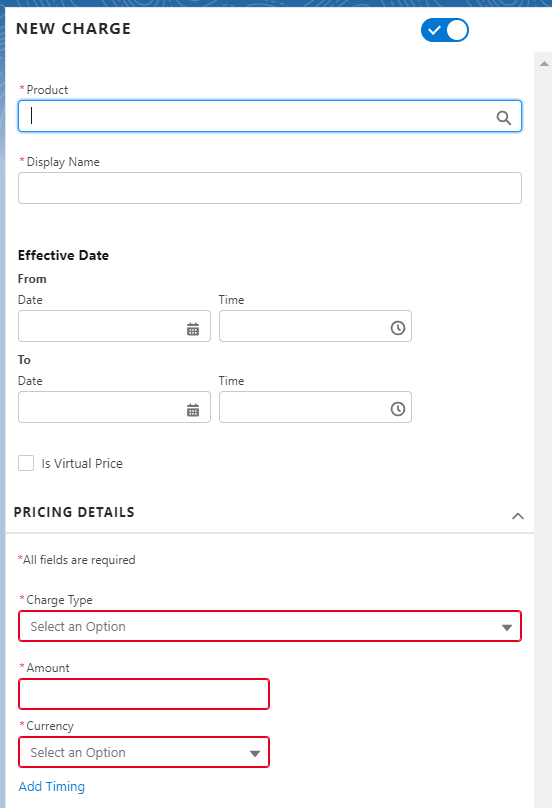
Fill in:
- Product (look up field)
- Display (this is what the price will look like in the cart, you can add text and numbers)
- Fill out at least a FROM date, leave TO dates blank
- Leave Virtual price unchecked (unless you know what you’re doing)
- Charging Type choose Recurring or One Time accordingly
- Set a number for the Amount
- And finally choose a Currency from the drop down list.
Assign the Rule Sets to each Child Price List
You can apply Context Rules to Price List Entries (specific products), entire Price Lists (useful to apply one to a child price list instead of going through each and every product), Discounts and Promotions.
- From the App Launcher, open the Pricing Designer.
- Open Price List tab from the power launcher
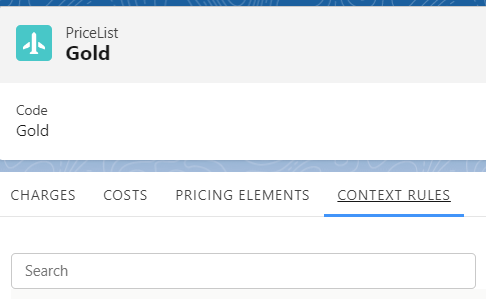
- Go through each of the Price lists we created before PLATINUM, GOLD, SILVER
- Open the Context Rules Tab
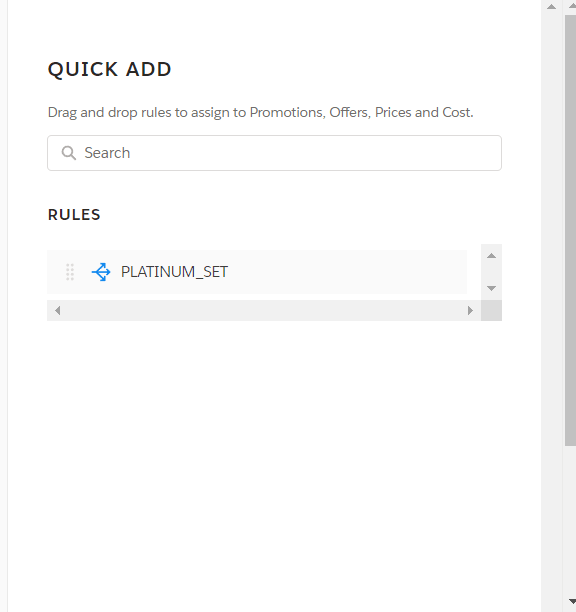
Use the Add symbol next to each one and assign accordingly:
For our Use Case, we’ll assign GOLD_SET to Gold Price List, SILVER_SET to Silver Price List and PLATINUM_SET to Platinum Price List.
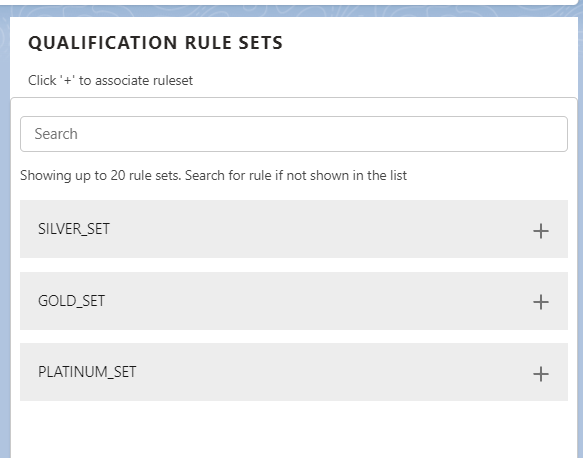
Rinse and repeat for each of the 3 child price lists.
Test the Cart
Since these are all Child Price Lists, you’ll only see the Parent Price List which hosts the default pricing and then picks out an entry from the child price lists when they qualify.
First, Pick an Account record and assign a level of Membership (Gold, Silver or Platinum) and save the record. Next, create an Opportunity from this Account and add a Product (one that you previously added pricelist entries, of course) and see if the Price is according to the account level.
Old Angular JS cart
- From an Opportunity, launch the CPQ cart clicking the the Configure button. This opens the Cart.
- Choose Main Price list (you should not see the child price lists listed here)
- Add a product to the cart
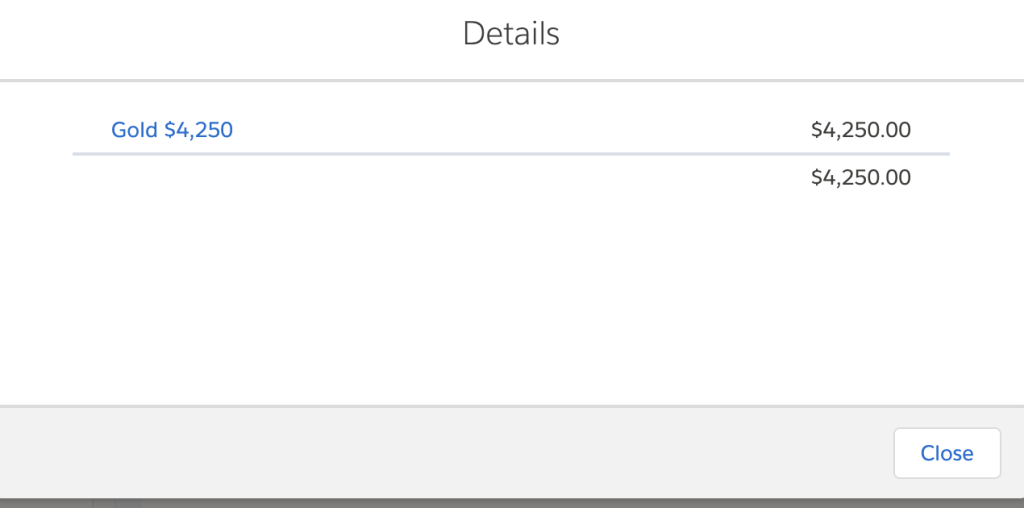
- Click on the Info icon next to the price, you should see this Details pop up, specifying that the price comes from Gold entry (this is the display text of the price list entry, I’ve chosen to name it Gold so that I could tell if the price was changing). And it’s also the right amount, so the Context Rules are working in the background and choosing the entry that is in the Gold Price List.
LWC cart
- Choose Main Price list (you should not see the child price lists listed here)
- Add a product to the cart
- The chosen price should be the one that matches the pricelist