
If you sell a Phone, why not offer a Plan with it? Product Bundles sell various related products together as a single unit for one price, encouraging customers to buy more.
Product Bundling tends to increase the average order value, because instead of just buying a Phone, you’re more likely to buy a case and a pair of headphones if it all comes in a Product Bundle.
Bundles aren’t created but designated as such. You take one existing product that will be the Main or Parent product and then add the add-ons as children to this product.
Beforehand, make sure:
- Create the products that will be part of the bundle
- Create or choose the main product that you’ll turn into the Bundle
Create the Product Bundle Structure
- Go to App launcher > Vlocity Product Designer
- In the Power Launcher, click the drop down arrow and select Products

- Open the Product you want to configure
You can designate an existing product as a bundle or create a new product to use as a bundle. It’s recommended that you create a new product to set as a bundle.
- In the Details tab, make sure the Specification type field has something or fill it now.
- You have to determine whether this “product” is a Product (such as a tangible product like a device) or a Service that you’re offering.
- Beware: The Specification Type you choose changes the base Salesforce fields that this “Product” has, so if you change the Specification Type from one to the other, you might end up with empty fields and a “Attempt to De-reference null object” error in the cart. When in doubt, just set everything as “Product”
- Once set the first time, the Specification Type cannot be changed through the Product Designer Interface, but it can be changed by modifying the Product record through Salesforce (since this is a Salesforce native field and not a Vlocity attribute). The changes will be reflected in Vlocity as well.
- In the Specification Sub Type Field, choose Bundle
- Click Done at the bottom of the page to save the changes.
If you can’t find these fields, make sure they are part of the Layout of the Object Type this product belongs to.
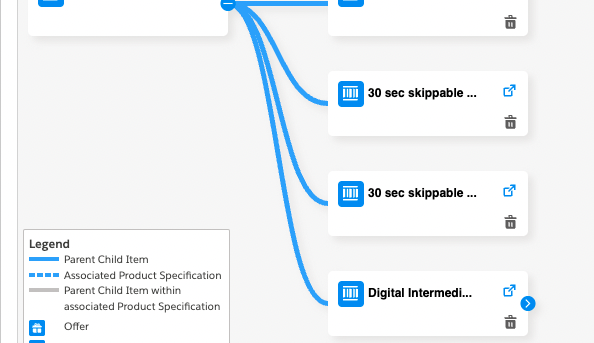
- Go to the Structure tab and on the right side there should be a pane.
If nothing appears, this Product has no Specification type or the products you want to add as children are not added to a Price List. Fix this and return to this step and refresh this tab.
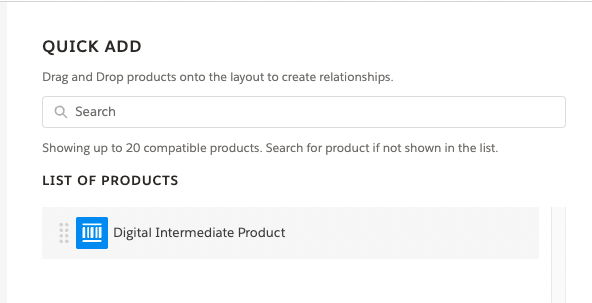
- Search for the product/service/offer or resource you want to add and in drag and drop it into the Product you want to set as the Parent in the diagram. That product should highlight green, drop it when it’s green.
Note: The Product’s Specification Type of the parent must match the Child Product’s Specification Type. This may seem obvious but if you later change the Specification Type of any of the children or the Parent, you won’t be able to make changes to the settings in the Structure tab, you’ll get an error message.

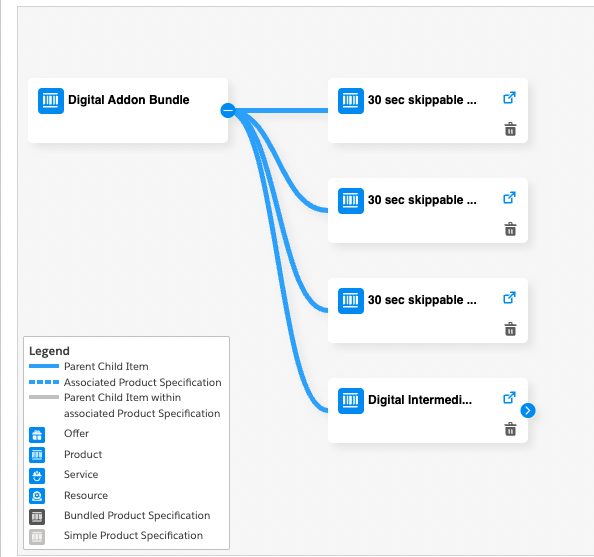
The Bundle structure should look like this:
Edit Relationship for the Parent Product
To set the relationship between the Parent Product and the Child Product, click on the white space in the boxes representing the Products in the Structure diagram.
Clicking on the Parent will show this:

You’ll see the Product Name, Cardinality and Group Cardinality
- Cardinality sets the number of times the Parent product can be added per Product Bundle. This ensures that the right quantities are added to the cart (not too many, not too few).
- Set the min to 1 if at least one must be added per order. Set the Max according to your Product needs.
- The Default Quantity is the quantity of the Parent product added when you press Add to Cart. This quantity can be overridden at cart after adding the Product Bundle.
- Group Cardinality sets the Max and the Min for the children products in the bundle, but you can set this individually for each of the children in the Product Bundle.
- Pricing Adjustments/Overrides: as the name suggests, you can apply overrides and adjustments to the bundle/parent product.
Edit the relationship for the Children Products in the Bundle
Click on the white space of any of the children products in the diagram.
The pane looks a little different from the Parent, allowing you to set Cardinality only for this particular product, pricing adjustments/overrides and an extra section for setting the Attributes that the product will have when added to the cart, brought by the bundle.
If you set Cardinality > Default Quantity to zero, this product will show a Add to Cart button next to it when the bundle is added to the cart. This could be useful if you want to show the Bundle’s child products as optional and not automatically added to the order.
Pricing Adjustments / Overrides for the Child Product
You can apply adjustments or overrides for prices of the Child Products within the bundle, these only apply when the Product is bought within the bundle, and the Product can retain its regular pricing when sold independently outside the bundle. This is specially helpful because you can set the total price for the bundle on the Parent product and add overrides for the children to set them as Zero, so they don’t affect the final pricing.
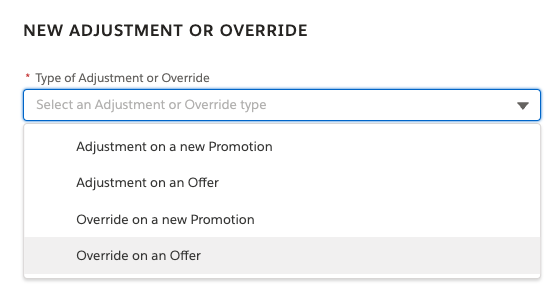
- Click on the + sign to add a new adjustment or override
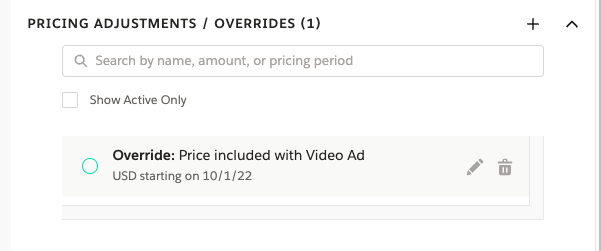
- Select the type of Adjustment or Override. For Products within a bundle, choose Offer. In this example, I’ll create an override to set the child product price to zero when it’s added within a bundle, since the final price will be set by the Parent Product (bundle)
- In Pricing Details, set the amount (in my case I’ll use zero) Make sure you put an amount, even if it’s zero, don’t leave it empty just cause it says zero already in gray.
- Choose the currency to display and the Recurring Frequency. Optionally you can add timing as well.
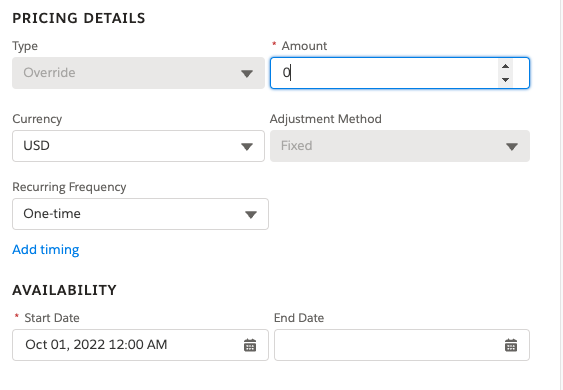
Don’t forget to set a date for Availability, at a minimum set the Start date and leave the end date empty. Set the start date in the past.
- Click Done to save the override/adjustment and then Done again to save the Relationship edit.
Attributes Override for Child Products in the Bundle
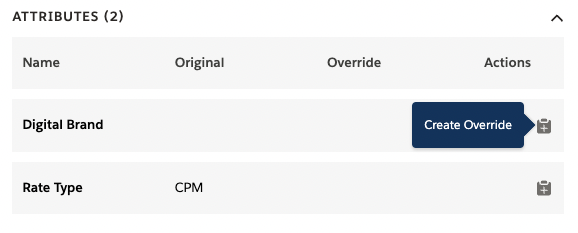
This section displays a list of Attributes that this child product brings, they’ll be added with their default attributes but there’s a button to Create Override if you want to set different values for the Attributes when this product is added to the cart via this Bundle.
To create an override for Attribute, click on the button. A loading screen will show (be patient) and a confirmation that the override was added. Now there’s a pencil icon next to it.
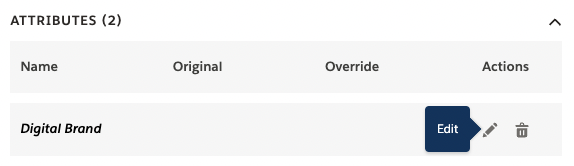
Click on it to add the override value. A new pane with Edit Attribute options shows.
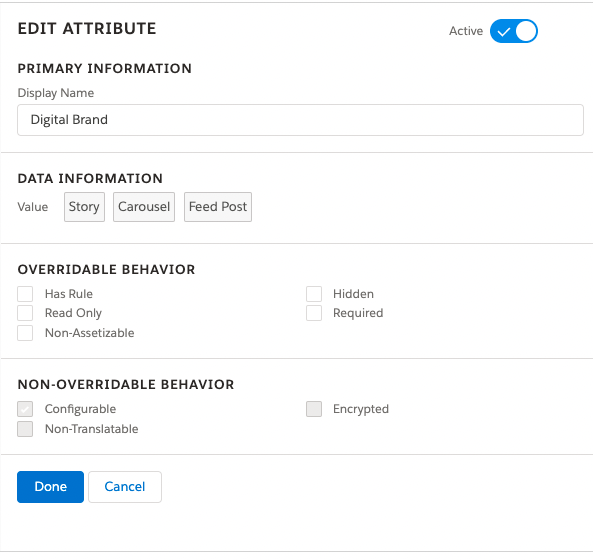
On this Pane, you can set this Override to Active (top right). This allows you to change the behavior or values of the Attribute only when it’s added to the cart as part of this Bundle
- Display Name overrides how this Attribute shows (only when added via bundle)
- Data Information displays possible values to set for this Attribute (which will vary from the picture and are determined by the Picklist associated with this Attribute.
- Overridable Behavior shows behavior options for this Attribute, just like in the Details Tab or the Layout Management in Object Type configuration.
- Non-Overridable Behavior shows behaviors that can’t be overridden.
Click Done when you finish configuring, to Save the changes.
Click Done again in the Edit Relationship Pane to Save the changes
Final Touches
Finally, clear out the cache to see your new bundle
- Go to App Launcher > Vlocity CMT Administration > Maintenance Jobs (in the Admin Console column)
- Check the Delete Old Data
- Run these 4 jobs (found at the bottom of the page) by clicking Start on each of them.
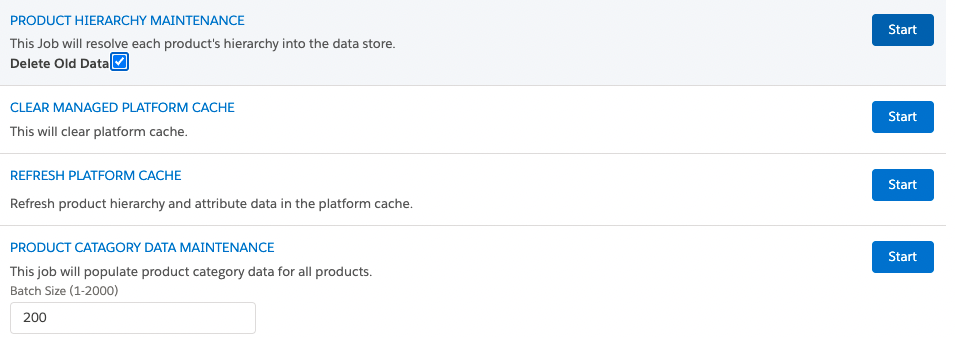
- Wait until they are complete and refresh the page (not the Salesforce Console tab, but the page).
Test your new Product Bundle
- Go to App Launcher > Orders
- Open an order or create a test one
- On the top right menu, click Configure
- Choose a Price List where the product “bundle” you configured is part of (or better said: that it has a price list entry)
- Add the Product to the cart, click on Add to Cart button.
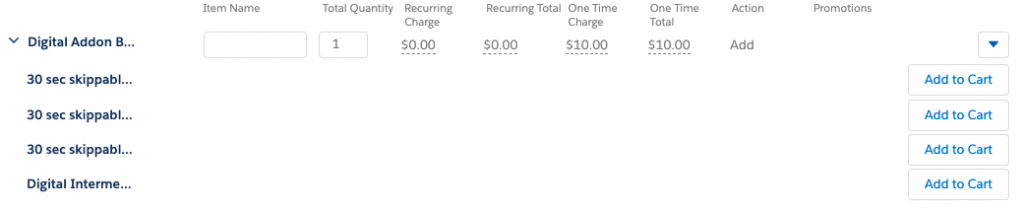
- In the cart, next to the Bundle name, click the drop down arrow on the left of the name to see the children products of this bundle
If you set Cardinality > Default Quantity to Zero, the children in the bundle will show Add to Cart buttons on the right side instead of automatically adding them with a quantity of 1.
All done. Congratulations, you have successfully configured a Vlocity Product Bundle

2 Responses
[…] Bronze, Silver or Gold. So many choices to pick from. Picklists are a list of values from where you can choose from. They populate the values in Attributes and are required in the process of creating a Vlocity Products and configuring Vlocity Product Bundles. […]
[…] How to Configure Product Bundles in Vlocity Product Designer […]