
Bronze, Silver or Gold. So many choices to pick from. Picklists are a list of values from where you can choose from. They populate the values in Attributes and are required in the process of creating a Vlocity Products and configuring Vlocity Product Bundles.
You should create Picklists before creating Attributes.
How to create a new Vlocity Picklist
This guide is for the Vlocity Product Designer, which is the new and more intuitive way of creating Vlocity Picklists. If you want to do it the old way through the Vlocity Product Console, you can follow this video instead.
- Go to App Launcher > Vlocity Product Designer
- In the Power Launcher, click the drop down arrow and open Vlocity Picklists
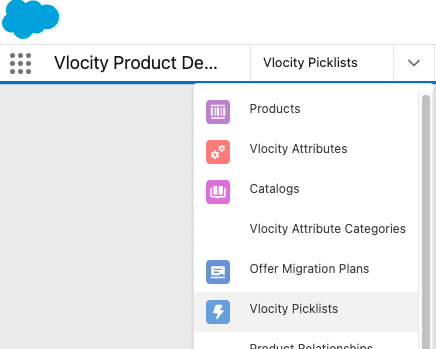
- In the top right corner, click on New button

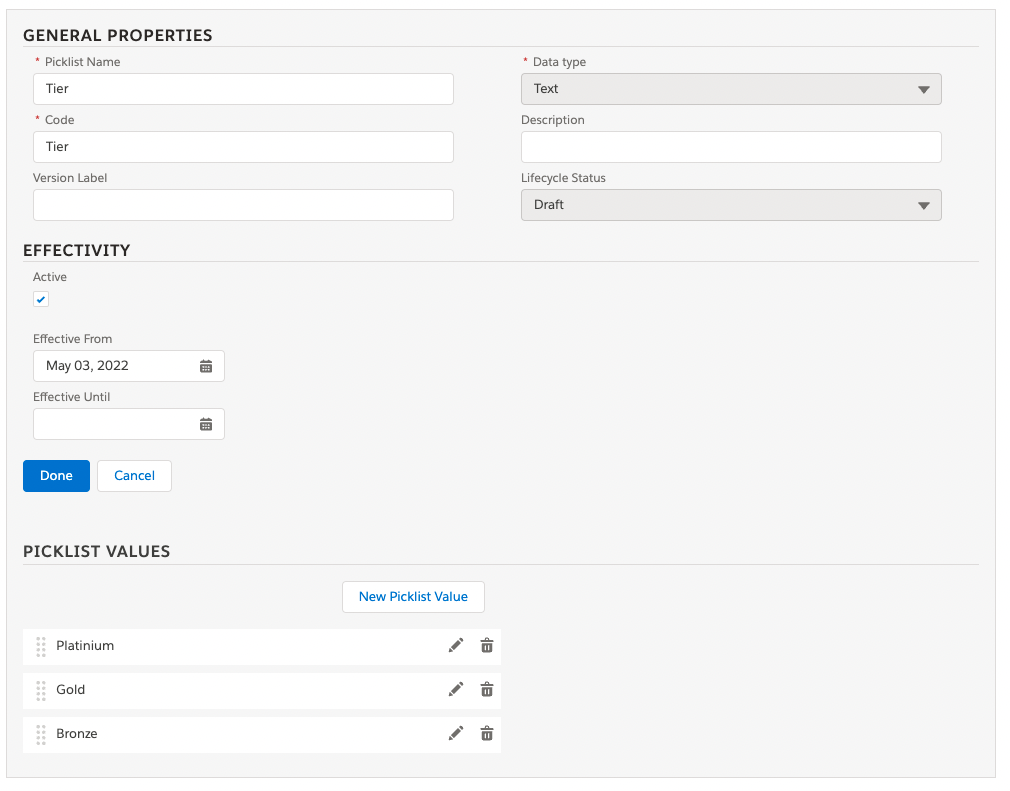
- Complete the necessary information about the Picklist you’re creating
- Name: Used for Product Design, not seen in the Cart.
- Code: Unique code to identify the Picklist. Recommended to use the prefix “PKL_” as naming convention, to distinguish it from Products and Attributes.
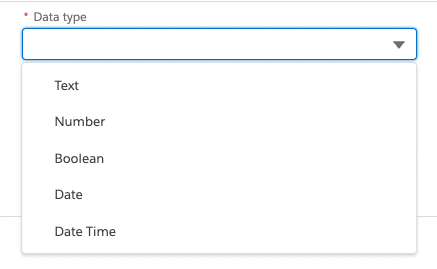
- Data Type: represents the kind of data that the picklist will hold. Much like Salesforce field types. Most of the time, you’ll be fine with Text.
- Description and Version Label are optional fields. Version is used for Versioning, which is still in beta development.
- Make sure Active is marked or you won’t see the picklist anywhere
- Set a date for Effective From. The Picklist won’t show up in the Product without a date or if the date is in the future.
- The Effective until is the date you want the picklist to disappear from Products. You can leave this empty for no expiration date on the Picklist.
- Click Done
Adding Picklist Items
After saving, you’ll land on another screen, where you’ll confirm the information you’ve entered and in the section below, you’ll configure the Picklist Items. If you make additional changes, click the Done button before you start adding picklist values.
- Click on the New Picklist Value button. A General Properties Pane will open next to the Picklist Values list.
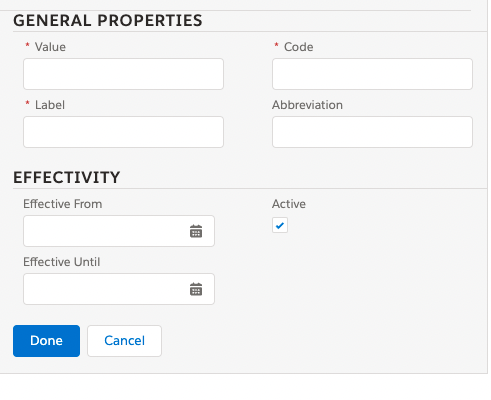
- Enter the required information for each of the Picklist Values you want to add then click Done to save it
- Value: The value for this picklist item must be unique within the picklist. The data type for this field is set by the Picklist’s data type.
- Code: a unique code (within the picklist) for this item
- Label: How it will appear on the picklist when interacting with it in the cart or product designer
- Active: indicates if the item is in use. Only Active items will be shown.
- Effective from: Enter a date from where the item will be shown.
- Effective Until is optional (only if you want to hide the item past a date).
To modify existing items, click the pencil icon next to the Picklist Value and click Done to save
- Click Done button under Effectivity to save all the changes
Congratulations! Now you can use your picklist in any Attribute you create.

2 Responses
[…] How to create Picklists in Vlocity Product Designer […]
[…] How to create Picklists in Vlocity Product Designer […]