
Products are the things or services that are offered to customers. Vlocity Product Designer allows you to create Products in a more friendly interface than Vlocity Product Console.
You can add multiple price entries to Products in different Price Lists and be part of Bundles and Offers. Vlocity Products take one step further, optimizing and customizing products with a flexibility of a professional gymnast.
Product Creation Workflow overall
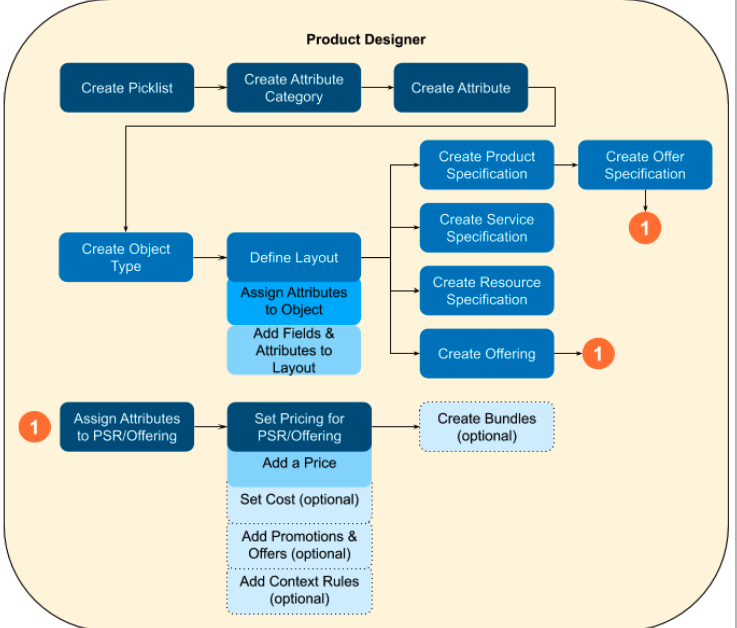
Before you start, you’ll need have the following created beforehand:
- Salesforce Price Book: so that you can later add the Price List to it, even if it’s just a generic one that you’ll assign multiple Price Lists. You can also use the default Standard Price Book.
- Vlocity Price List: at least one, to assign the price to the Product you’re creating. You can later add more Price Lists as you need.
- Picklists: with options for your product attributes or features.
- Attribute Category: to which you’ll add the attributes you’ll create.
- Attributes: to assign picklists, or more advanced features such as Attribute Rules and setup Attribute-based pricing
- Object Type: carries the Layout, Fields and Attributes a Product will show. (You can use the default Product2)
- Define Layout and Facets for the Object Type: this will determine the fields available in the product you’ll create
- Assign Attributes to the Object Type:
- Assign Fields and Attributes: so that they show up as fields in the Product
Once you have all those things taken care of, proceed with the steps below to create Products.
Steps to create Products in the Product Designer
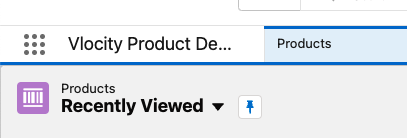
- From the App launcher, open Vlocity Product Designer
- From the Power launcher (right next to the app name and app launcher) in the dropdown menu, choose Products, you’ll see a list of existing products
- On the top right corner, click New
- In ASM, you will be asked if the new product is a Product or Class, choose Product and click Next
- Fill out the necessary information.
Some fields may differ depending on the Product Layout and Attribute fields added to products
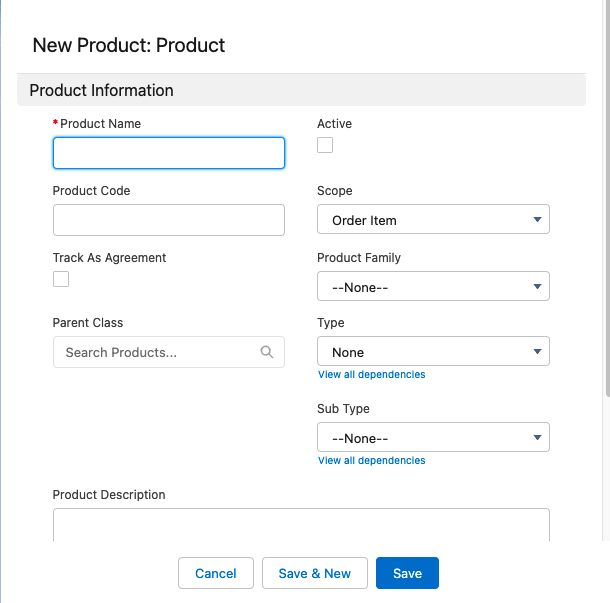
- You just can fill out the necessary fields (Product Name, Product Code and Active Checkbox) to create the Products and Save. You can add more details in the next screen.
- You’ll get a green confirmation that your product was created and the next screen will appear, where you can further configure the details of your new product
Details Tab
The Details Tab is defined by the Object Type’s Layout assigned to the Product. If you change and save the Product Object Type and save, the layout (and the fields/attributes shown in this screen) will change.
- Scroll down and pick an Object type by clicking the magnifying glass icon.
If you have nothing setup or just want to leave it general, pick Product2 Object then click Done at the bottom of the page and refresh. This will show the new layout applied based on the Object Type chosen.
Be careful, if you choose an Object Type that has no Layout, then you’ll see an empty screen on the Details Tab.
- Fill out the necessary fields for the Product according to the Layout presented
- Don’t forget to mark the checkboxes for Orderable and Active, as well as fill out Selling Start Date and Fulfillment Start Date fields. Without these, the product won’t show up in the Cart. Also, if the dates are in the future, the product won’t show up either.
- Click Done to save
- You can also add an Image to the Product by going into the Attachments section (see below)
Pricing Tab
You can always change or add new Price Entries later
- In the Prices section, click the New Price button.
The Add Price pane will show on the right. Make sure Active is marked.
- Select a Price List
- In Display Name, set what the price will look like from the Cart.
Note that, while this can be the same as the Amount, it can also be different and include text like “One Time” or “Special” or anything else you want, it’s simply a Display value.
- In Pricing Details, type in an Amount and pick a Currency and a Recurring Frequency for the charges.
- Check that the Start Date is set
If set in the future, the product won’t show up with that price until that date, and if this is the only available price, then it won’t show up at all in the cart until said date.
- Click Done to save the changes. You’ll see the new Price entry under Prices
- Promotions and Offers section is optional if you want to make the product part of a promotion and/or offer previously defined
- Costs are also optional
By adding an entry here, you can keep tabs on the costs that this product has and quickly visualize the profit and loss margins, if the company is meeting financial targets on specific products; and since margins are automatically calculated based on the cost and prices, it gives a better view and understanding of margins and how to keep the costs down.
Structure Tab
Shows the relationship between a Product and bundles that this product is part of, as well as offers and related services. This is optional and not necessary to configure at this time.
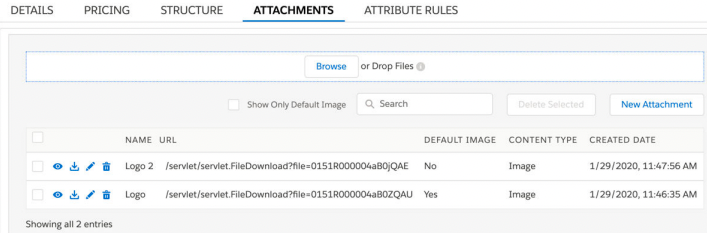
Attachments Tab
Allows you to add files to the product, including documents and images, which are shown in the Details Tab that we saw before.
How to add a Product image or icon
- In the Attachments Tab, click New Attachment, a side pane opens on the right side
- Type a Name in Attachment Name, add a description
- Choose a Content Type from the dropdown menu (according to the file being uploaded). In this case, we select Image and check the box “Default Image” to set as Product Image.
- Select the image
- If the image is hosted elsewhere, check URL and Paste the URL in the field
- If the image is in your computer, check Browser or Drop Files and click Browse to upload the image. There’s a file size limitation of 5MB and 40 characters on the file name.
- Set the Sequence. This determines the order in which the file is shown. Set this to 10.
Context Rules Tab
These rules change what products, promotions and prices appear as Qualified products in the cart to a particular customer. For example, if a product is offered at a discount to loyal customers, or clients who have been with the company for more than a year, this is achieved with a Context Rule.
You have to set them up beforehand so that they can show up here on this tab, available to select as you create products but you don’t need to do this step right now, nor is it required for regular product setup.
All set! Test your Product
- Go to App Launcher > Orders
- Create or open an existing Order
- In the Order details page, click the dropdown in the top right menu and choose Configure to launch the Cart
- In the Cart, check that the Product you just created is available in the left pane of Qualified products.
Congratulations! You have successfully created a Product using the Vlocity Product Designer!
If you need more information about how to handle Products, check out Salesforce’s CME EPC document.

10 Responses
[…] Create the products that will be part of the bundle […]
[…] at least one Product created beforehand that uses […]
[…] you can choose from. They populate the values in Attributes and are required in the process of creating a Vlocity Products and configuring Vlocity Product […]
[…] Attributes extend and add flexibility to Products in Vlocity. Attributes allow users to filter and configure Products, change pricing with Attribute-Based pricing and map products based on their […]
[…] How to create Products in Vlocity Product Designer […]
[…] How to create Products in Vlocity Product Designer […]
[…] How to create Products in Vlocity Product Designer […]
[…] How to create Products in Vlocity Product Designer […]
[…] How to create Products in Vlocity Product Designer […]
[…] How to create Products in Vlocity Product Designer […]