
Let’s say you want to sell Watches, but you have different colors and features and each of thse influences the final price. Traditionally in Salesforce, you would have to create multiple products just to represent all the variations of a single base product. In Vlocity, you can simple setup the base product and then configure all the attributes (like Color, size, connectivity, features, plans, screen size) that influence the final price.
Using Attribute-based pricing, the products can be configured to use dynamic pricing based on the attributes or fields that are chosen.
Step 1: Install Attribute-based pricing DataPack
These steps were tested in Salesforce Media Cloud ASM and SLM versions, they should work just fine in any other Salesforce Industries flavors.
- We’ll be installing this Process (make sure you’re signed in on the Org you wish to install this)
You’ll need a Vlocity University Account and you’ll have to sign in. If you don’t have an account, create one, activate it and then come back.- Download Attribute/Volume Based Pricing Apex Classes to install manually in a later step

- Hit NEXT to install the DataPack to Salesforce (bottom of the page, blue)
- Choose if production or sandbox from the dropdown menu.
You might be prompted to sign in to your org. Make sure you’re logged in the correct org.
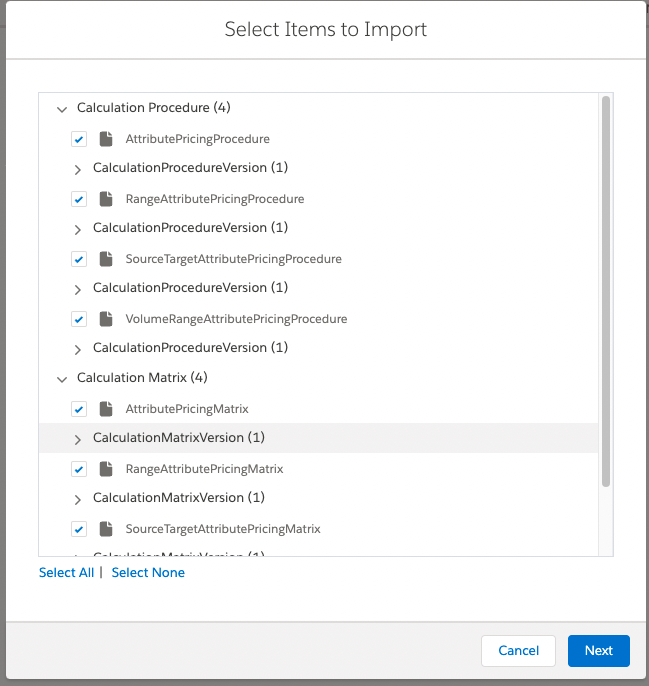
After signing in, hit Install Vlocity DataPack - Make sure everything is selected and hit NEXT and then on the review click NEXT again
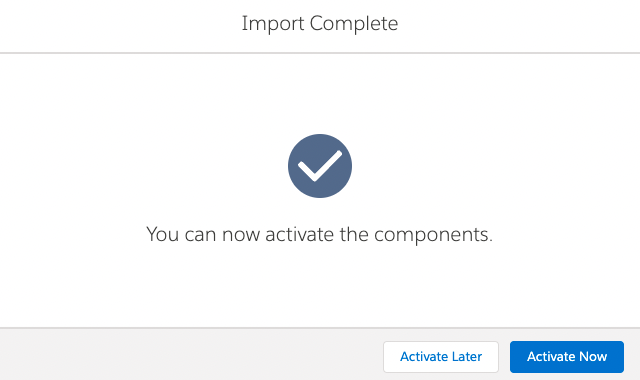
- Once the import is complete, click on Activate Now.
If you get a Time Out error, just go back and try to install the datapack again.
- Select all and hit NEXT
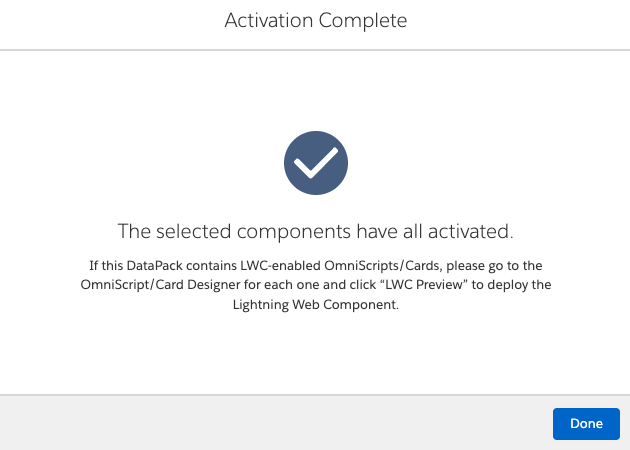
- Wait for the activation to complete and then hit Done
Step 2: Check that Everything was installed correctly
These checks are optional, you could skip to Step 3 and trust that everything was installed correctly, but I encourage you to do these checks now instead of waiting for something to break and then having to trace your way back to check that everything was installed correctly.
Check the data packs
- In the same screen (Omnistudio DataPacks) click on the Installed tab
Check for the DataPack
- Check that VPL-AttributeAndVolumeBasedPricing-CMT exists (usually at the end of the list)
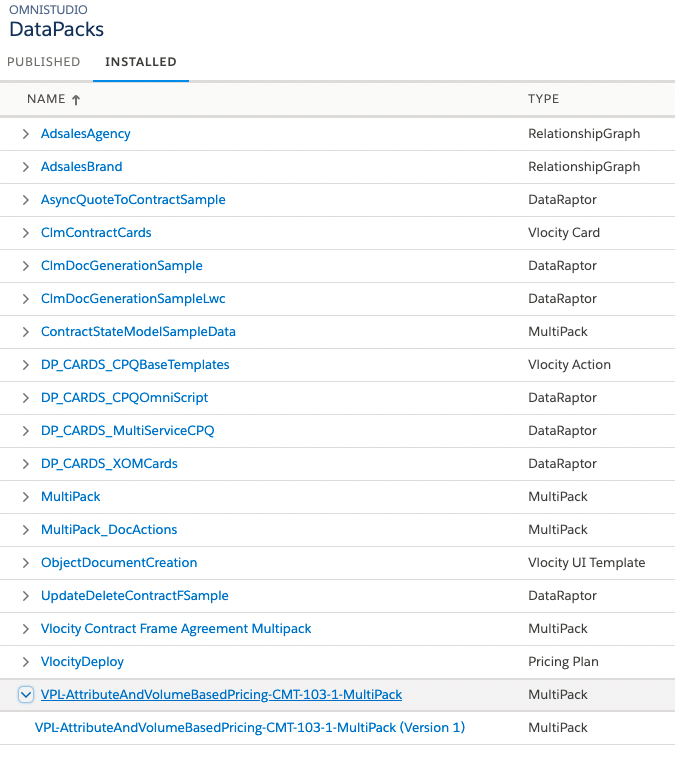
If it’s there, then you can go ahead and close that tab/window and continue with the checks.
Check that the Default Pricing Plan is installed and the right fields are displayed
- Go to Vlocity Product Console > Dashboard > Pricing Plan and press ENTER
- Default Pricing Plan should show
- Check that the Parameters field displays in the General Properties pane in the Pricing Plan Steps facet of the Default Pricing Plan.
If the Default Pricing Plan isn’t shown, run the EPC job
- go to Vlocity CMT administration (from the app launcher)
- In the middle column, in the admin area, open EPC Jobs
- find the INSTALL DEFAULT PRICING PLAN DATA job, and click INSTALL
- Once that’s done, go back to previous section and check for Default Pricing Plan

If Parameters field isn’t displayed, enable it
- If it doesn’t display, go to CMT Administration > EPC Jobs > Install Default Vlocity Objects and Layouts > Install
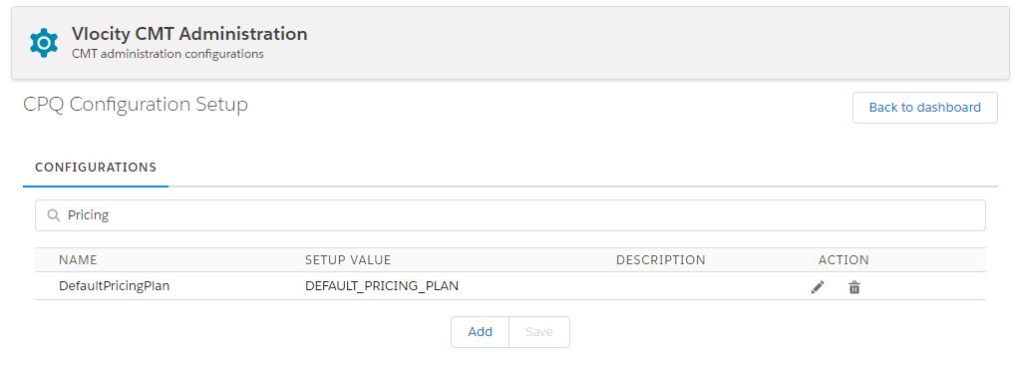
- The DefaultPricingPlan custom setting are in CMT Administration > Custom Settings > CPQ Configuration Setup
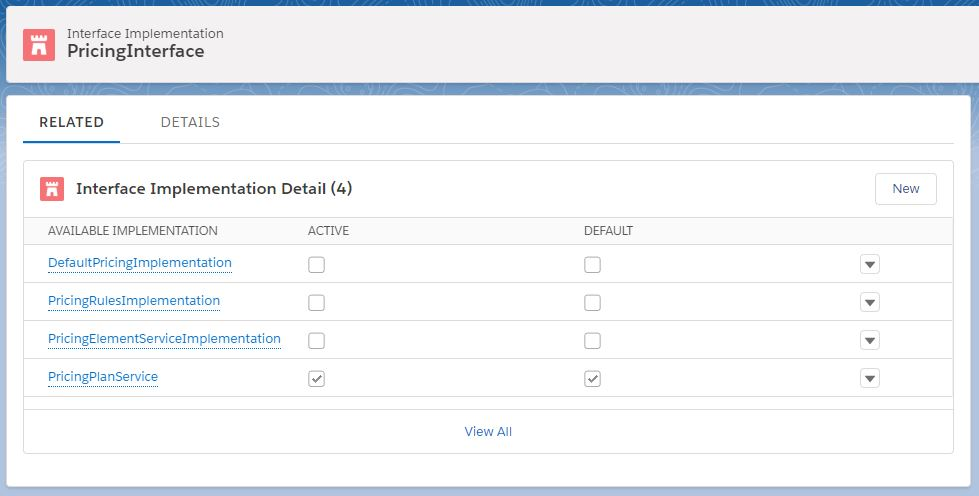
- The PricingPlanService implementation is active and set to default from the PricingInterface on the InterfaceImplementation tab.
Step 3: Create Apex Classes for Vlocity Attribute Based Pricing
Remember the Apex classes you downloaded in Step 1?
- Go to Setup > Apex classes > New
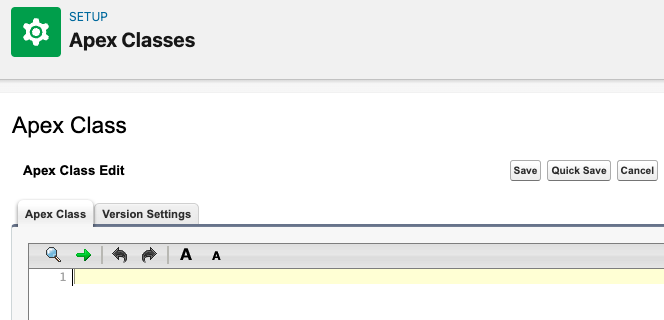
- You must create the classes in this order or they won’t work, because they are dependent on each other
- PricingPlanHelper.cls
- CustomPricingPlanStepImpl.cls
- CustomPricingPlanStepImplTest.cls
- Open the Classes you downloaded in Step 1 (use a text or code editor) copy the contents of each class and paste it on the Apex Class Edit and hit Quick Save (the “save” button sometimes gives an error)
- Go back to Apex Classes and Hit New. Repeat the process to create the other two remaining classes
If you have an org with Vlocity package that is 900.468 and beyond: PricingPlanHelper Apex class needs an additional line to patch some new changes Vlocity introduced. Please do the following.
- Open PricingPlanHelper apex class
- Go to line 1077 in the code, at the end of the line, press enter to add a new line and add the following code:
'isExpressionSet' => false,Should look like this:

Step 4: Setup Calculation Matrix for Attribute-Based Pricing
Create a new Vlocity Calculation Matrix from the existing AttributePricingMatrix v2
- Go to App Launcher > Vlocity calculation matrices > AttributePricingMatrix > Related Tab
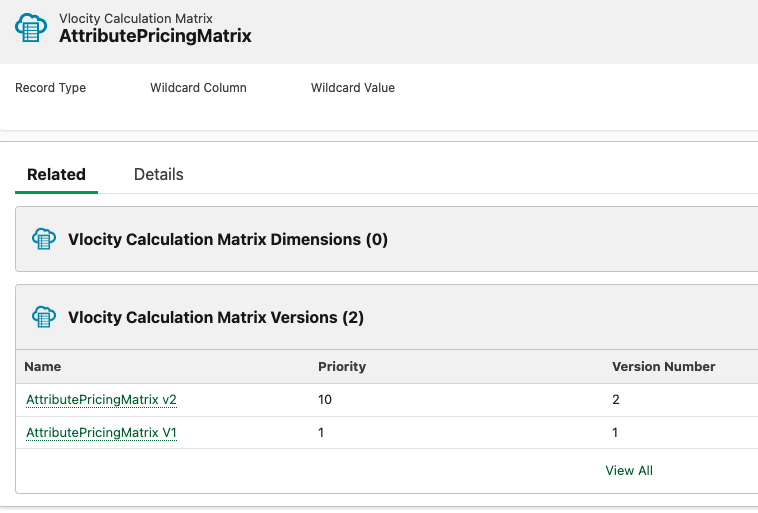
- Click on the latest version of all the available ones, most likely v2
- On the top right corner, click on the Create New Version button.
A small dialog will pop up, wait until it disappears
If you don’t see the table above and get this message:
This page is no longer available. Use the App Launcher to access Decision Matrices.
Don’t panic. It means you’re using a Vlocity release of Spring 22 and forward, in which Omnistudio uses Salesforce Objects instead of Custom Objects. You’ll have to enable the Legacy Calculation Matrices from setup to work with the old Interface and come back here.
Create CSV Pricing Matrix using the legacy Calculation Matrices interface
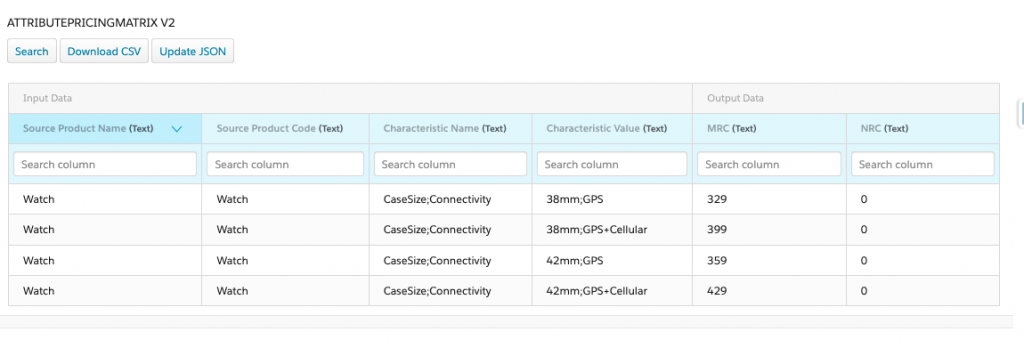
- Click Download CSV
- Preparing the CSV Calculation Matrix
- For more details, see: Creating Combinations for Vlocity Calculation Matrices
- Don’t modify the column header names, don’t remove or add
- DO NOT CLICK Delete all, it will vanish the table and mappings and re upload won’t work
- Careful with extra spaces at the end or beginning of, things must match exactly the information in the Product.
- Every row entry is a permutation of the product, combination of Attributes
- Fields
- Source product name is for product name (as is in the product setup) Case sensitive
- Source Product Code is for the product code. Case sensitive and space too
- Characteristic Name this is the attribute field name, you can add multiple separated by semicolon ( ; ) like Case Size in the example or Color
- Characteristic Value the specific choice from the attribute (for example, the measure of a case size or the color red) separated by semicolon ( ; )
- MRC is for recurrent monthly charges if this is a subscription. If you won’t use, leave as zero
- NRC is one-time charge. Use this for the purchasing price. If using monthly, leave as zero.
- Once you’re done, click Delete Data (not to be confused with Delete All)
- Click Upload CSV, pick the CSV file you prepared and click Save Data
- Click the pencil on Priority and set a number higher than the previous version (like 100) and check Enabled checkbox.
- Click Save at the bottom of the page (not to be confused with Save Data in the matrix table)
- Once enabled, the matrix table cannot be edited. You’d have to create a new version, re-upload and set priority and enable.
Test the Calculation Procedures and Matrices by simulating all the steps
- Go to App launcher > Vlocity Calculation Procedures > AttributePricingProcedure > Related
- Click on the latest version and go to the Simulation tab
- In some orgs, the Simulation tab (with its component) is not present on the Page (next to Calculation Step), if you can’t find it, add it to the page:
- click the Config cog > Edit page
- Add a new tab, called Simulation
- In the component list, add Visualforce component (not to be confused with Vlocity Visualforce) on the Simulation tab
- On the right side pane, in Visualforce Page Name, select PricingProcedureSimulation and set Height to 1000 (for better visibility)
- Click Save and Activate as Org Default if necessary.
- In some orgs, the Simulation tab (with its component) is not present on the Page (next to Calculation Step), if you can’t find it, add it to the page:
- Select all the hypothetical parameters of the product for simulation (based on existing products) and hit Simulate All Steps
- If you get a calculation result, then the procedure was installed correctly
Step 5: Add Attribute-Based Pricing as a Step in the Default Pricing Plan
- Go to Vlocity Product Console > Pricing Plan
- Click on the magnifying glass and open the Default Pricing Plan clicking on the pencil icon to edit it
- On the left side pane, click on Pricing Plan Steps. You’ll see a list of plan steps
- Click on the New Item button, a pane opens on the right side.
- In the General Properties pane, enter the following
| Name | Calculate Attribute Based Pricing |
| Description | Custom pricing step |
| Implementation Name | CustomPricingPlanStepImpl |
| Method Name | GetMatrixPrice |
The General Properties Pane should look like this:
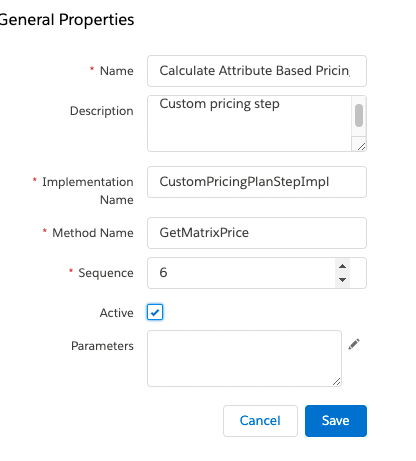
- In the Sequence field, make sure you choose a number before the Initialize Pricing Context but after the first step (that’s why I chose 6)

- For Parameters, click the pencil icon and click the + button to add each parameter
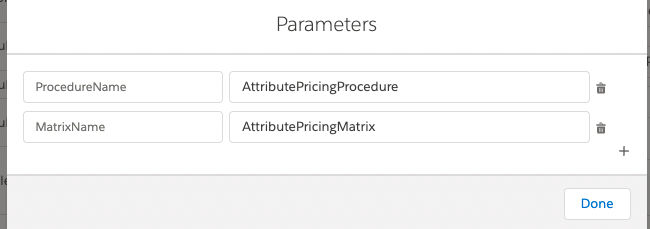
| ProcedureName | AttributePricingProcedure |
| MatrixName | AttributePricingMatrix |
- Click Done and then click Save on the General Properties pane
Final Step: Test Attribute-Based Pricing in the Cart
If you completed all the previous steps correctly, test out the Attribute-Based pricing with a test order and play around with the attributes of a chosen product.
- Create a test order. Fill out the required fields and save
- In the Order, in the top right menu, click Configure
- If the Configure button doesn’t show, add it to the page:
- Click the config cog > Edit Page
- Wait until all the components load
- Click on the Highlight Panel (the component at the top with the 3 buttons)
- In the side panel options, click Add Action
- Search for Configure, choose Configure under Custom Actions and click Done
- Click Save in top right corner and Activate as org default (if necessary)
- If the Configure button doesn’t show, add it to the page:
- Select a Price List from the dropdown
- Add a product to the cart (product must exist in the matrix CSV you uploaded before)
- Change the options in the attributes and see if the price gets updated
- Click the price and then the info icon to see where the pricing has been calculated from, if it says:
- “Priced from AttributePricingProcedure” then it’s working.

Congratulations! You have successfully configured Attribute-Based pricing in Vlocity.

3 Responses
[…] Attributes: to assign picklists and create Attribute-based pricing […]
[…] Products in Vlocity. Attributes allow users to filter and configure Products, change pricing with Attribute-Based pricing and map products based on their […]
[…] How to setup Attribute-based pricing in Vlocity […]