
Importing existing maps data from other mapping software can be invaluable. Salesforce Maps allows to display KML files as a layer.
First, you’ll need to add the KML file to Salesforce Files to be able to access it through Salesforce Maps.
Upload the KML file into Salesforce
- Open the App Launcher and type in Files. Click on Files to open it
- Create a new library and name it SF Maps Files
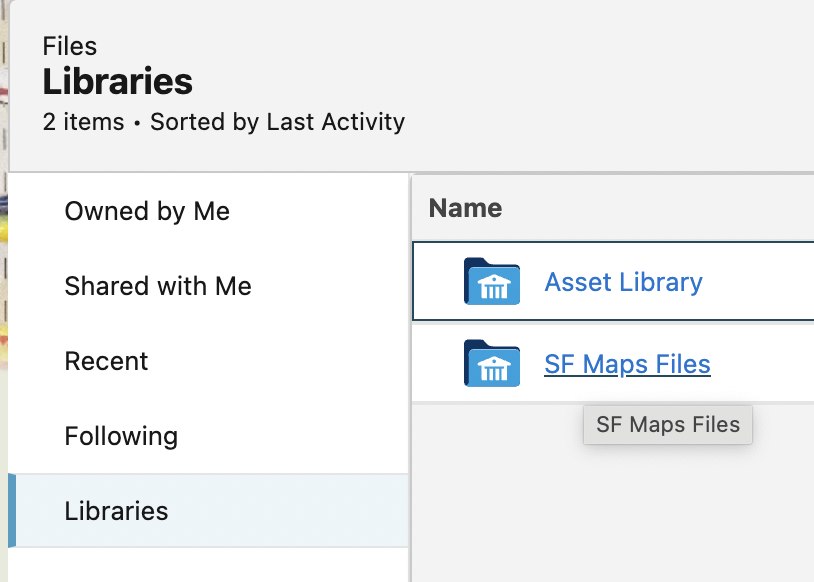
- Open the SF Maps Files library and click Add Files
- Click Upload and find your KML file
Add KML to Salesforce Maps as a Boundary layer
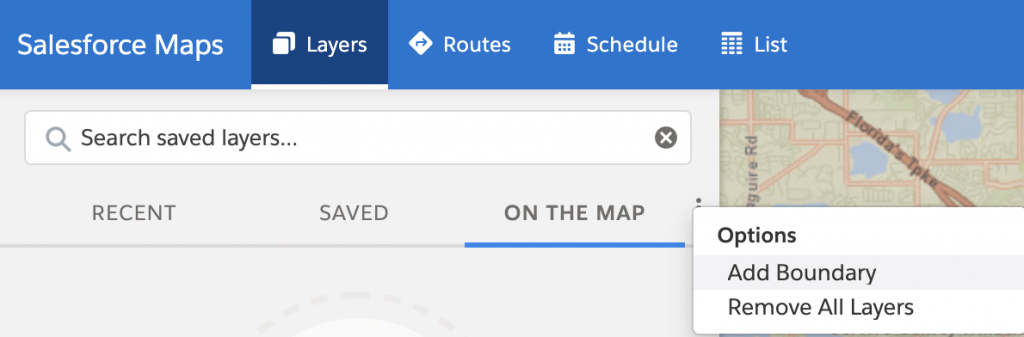
- Click the App Launcher and type in Salesforce Maps and open it
- Click on the Layers tab on the top left
- Next to the ON THE MAP tab in the left sidebar, hover the three dots and click on Add Boundary
- On the Boundary card, click on Type and select KML
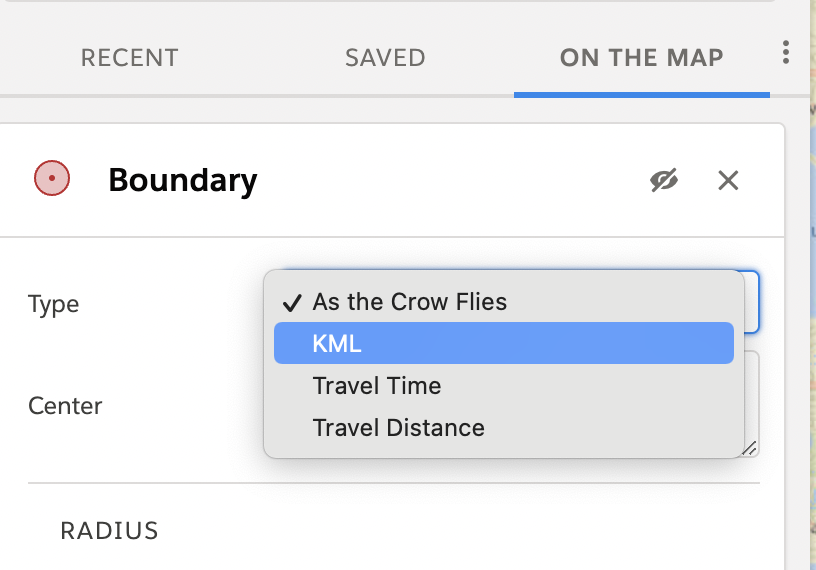
- In the selector, select your previously uploaded KML file
- Click Apply Changes to see if the file loads on the map without problem (If you get an error, see the next section below)
- If everything loads correctly, click Save
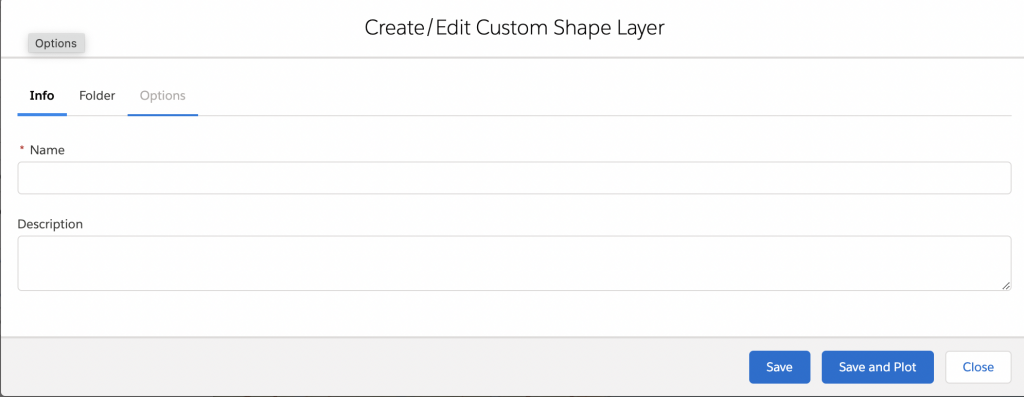
- Type in a Name and Description
- Click on the Folder tab and select where you’d like to store the map layer
- Click Save
The shapes or placemarks will show in the color that they originally were in the Software they came from (Google Earth or ArcGIS). You can’t change the color or any attribute of the boundary once is loaded into Salesforce Maps. But, you can change the color using Google Earth.
Can’t display KML files in Salesforce Maps?
If you hit any of the limitations you’ll get a “Boundary Error: Unable to retrieve or parse the KML document” error message in the bottom right corner of Salesforce Maps.
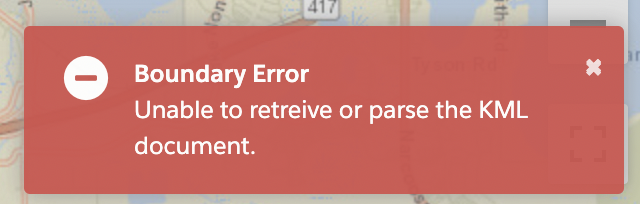
It might be one of these reasons:
- The KML file is bigger than 5.7mb (see how to break it down)
- The KML is not properly formatted (see how to edit it or convert it)
Was this article helpful?
YesNo

3 Responses
[…] you’re ready to Load the KML file to Salesforce Maps and see the new color […]
[…] the edited file and Load it into Salesforce Maps to test if this fixes the KML […]
[…] You can also differentiate markers by using different colors or marker modes. Keep in mind that this method won’t work for things you load from KML files. […]